Table of Contents
DOIs
A DOI (Digital Object Identifier) is an alphanumeric string assigned to online content to provide persistent access via an active web link. DOIs are primarily used in academic contexts and can be assigned at a high level (e.g., books, journals) and more granularly (e.g., articles, data sets, cover art).
DOIs have been in use for over twenty years, and there are a number of registration organizations, with CrossRef This link will take you to an external website in a new tab. and DataCite This link will take you to an external website in a new tab. being two of the most prominent. These identifiers are important for ensuring that digital content remains accessible and discoverable even when URLs change or content is migrated.
The CSU has a CrossRef subscription to register DOIs for articles published in in our OJS journals. Once your journal is established, the CSU Chancellor's Office will configure your journal so that DOI registratoin is possible. At that point, you will be able to register DOIs for each article published. If you have any questions about this process, please contact Dana Ospina.
How to register a DOI:
When you are ready to assign a DOI to an article and/or a full issue:
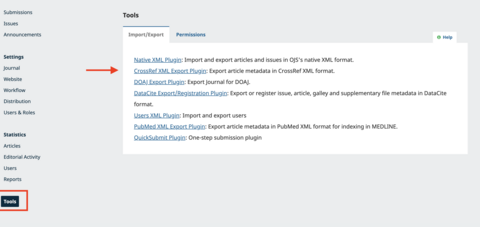
open the TOOLS menu and select the CrossRef XML Export Plugin
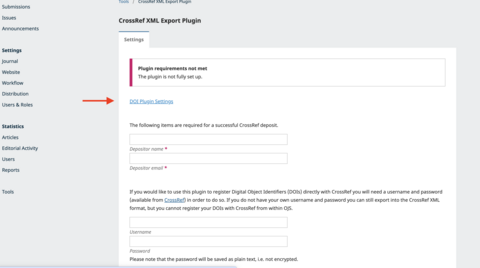
Once in the CrossRef XML Export Plugin page, select DOI Plugin Settings (please note that the blank fields shown here will be populated by the Chancellor's Office)
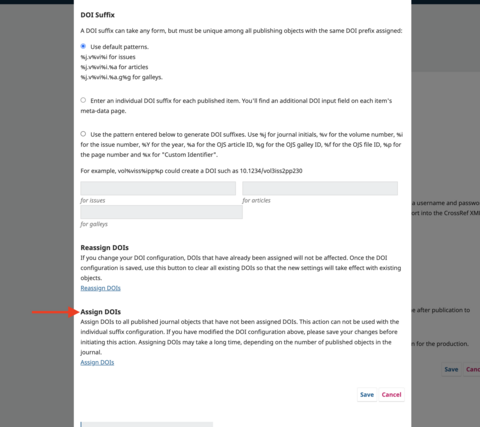
Scroll to the bottom of the DOI Plugin Settings page and select Assign DOIs and then select Save
Once you have completed these steps, publish your issue.
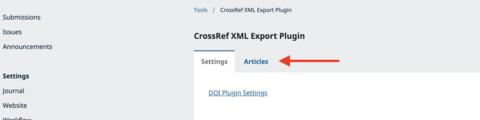
Once the issue has been published, return to the CrossRef XML Export Plugin page from the TOOLS menu and select the Articles tab. (This tab will not be visible until the Plugin has been configured and DOIs have been assigned to articles)
Tick the box next to any articles in which the status is designated "Not Deposited" (the image below depicts "active" registrations, but this is where it will say Not Deposited). After you have selected all the Not Deposited articles, select DEPOSIT. If the registration has been successful, all the articles will now show Active.
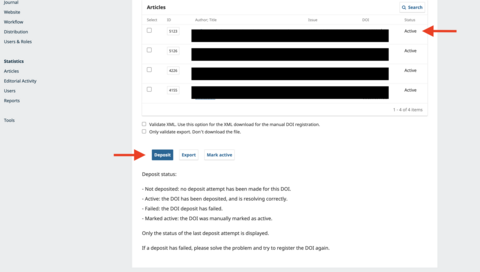
If the articles do not change to active, repeat the selecting and depositing steps. If you are still encountering issues, contact Dana Ospina.